I’ve been unemployed for about a month now, and have been keeping busy applying for jobs and all of that fun stuff, but I’ve also been trying to switch up our dinners as well. Yesterday, I made some meat and veg pasties (pronounced PAST-ees, not PASTE-ees) with stuff we had on hand, and realized quickly it would be a pretty customizable recipe. Writing it down here to save and share.
Ingredients:
Crust Ingredients:
- 2 cups all-purpose flour
- 1/2 tsp salt
- 1/2 tsp ground white pepper
- 1/2 tsp baking powder
- 1 cup (2 sticks) butter
- about 1 cup ice water
Filling Ingredients:
- 1 Tbsp olive oil
- 1 large onion, roughly chopped (like 1/2″ pieces or so)
- 2 lb ground beef (you could also use pretty much any meat cut into little bits; I just used ground beef because we had it on hand)
- 1 tsp kosher salt
- 1/2 tsp ground white pepper
- 1 tsp Penzeys Bavarian Style Seasoning or whatever salt-free seasoning you like – if you use one that has salt, omit the kosher salt
- about 2 cups chopped, cooked veg of some kind (I used broccoli, feel free to change it up)
- about 2 cups of shredded cheese of your choice, if you want (sometimes I don’t use cheese at all; this time I used mozzarella, again, switch it up)
- 2 eggs
Method:
Crust Method:
First of all, there is no shame in using commercial pie crust. It will turn out fine, so feel free to do that. Despite my husband’s insistence, there is nothing magical about homemade pie crust. We just don’t use it because I have family members who are sensitive to high fructose corn syrup and it’s easier for me to just make stuff by hand.
If you want to make the crust, though:
- Place flour, salt, ground white pepper, and baking powder in a large bowl and mix them thoroughly.
- Cut the butter into small chunks and add the chunks to the dry ingredients in the bowl.
Here you have two choices – you can use a pastry cutter to cut the butter into the flour (this is what I do when I have time) or you can dump the whole thing in a food processor and whiz the stuff around till it looks like pieces a little bigger than breadcrumbs (this is what I do when I don’t have time). Either way works fine; I prefer the pastry cutter just because I like cooking with my hands. - Once the butter has been cut into the dry ingredients in whatever method you prefer, put the mixture back in the large bowl if it’s not there already and make a well in the middle.
- Going SLOWLY and GRADUALLY, add the ice water (just the water, not the ice) to the dry ingredients 1/4 cup at a time. As you add the water, use a spoon to mix the water into the dry ingredients. Mix each addition thoroughly before making another well and adding another 1/4 cup. You will eventually get a mass that mostly clings together in the middle of the bowl, with some dry ingredients left around the edge. That’s what you want.
- Using your hands, gently knead the dough in the bowl until you’ve taken up most of the dry ingredients around the edges. It might be a little sticky in spots, this is ok, hands are washable. Once you’ve gotten most of the dry ingredients incorporated and the dough feels smooth-ish, wrap it in some plastic wrap and chuck it in the fridge to rest for an hour or so. (It can rest overnight with no problem, so if you want to do the dough ahead of time, that’s totally doable.)
Filling Method:
Get out a very large pan to cook the filling. You’re going to want something both wide and deep. This makes a ton of filling. The good news is it’s delicious and if your household is anything like mine, people will wander by to eat spoonfuls of the filling as you’re working and ask WHY dinner isn’t ready YET, so this recipe includes plenty of tolerance for snacking.
- Add the olive oil and chopped onions to the pan over medium-high heat. Saute the onions until they begin to caramelize – nice and brown on all sides – stirring frequently to avoid burning.
- Once they’re cooked, dump the onions into a large heat-tolerant bowl to save them.
Add the ground beef, salt, pepper, and seasoning to the hot pan. Mix it all up and brown the mixture well. (If you use very lean meat, you may also want to add a Tbsp of olive oil here as well, just so it doesn’t all stick and burn. Up to you. We buy higher-fat ground beef, so I end out with the opposite issue – I drain most of the fat off once the beef is cooked. If you have higher-fat meat, you’ll want to drain most of the fat off once the meat is cooked.) - Add the chopped, cooked vegetables and the onions you already cooked to the meat. Turn the burner down to medium and cook the whole thing for a little bit till the flavors are well combined. (Feel free to sample. That’s how I gauged it. 🙂 )
- Turn off the heat and let the filling cool a bit. Go do a logic puzzle, play with your pets, play a video game, or whatever for a little while. You don’t want to fill cold crust with hot filling. Now you see why this recipe includes enough filling for snacking… at this point, my household gets restless.
Assembly
Before starting the assembly, crack the two eggs into a glass bowl or measuring cup and scramble them up with a fork. Get a pastry brush and plop it in the eggs and set it aside. Also, get a clean fork, and prep 2 large baking sheets with parchment paper or cooking spray. I love parchment paper because it means I don’t have to wash things, but your mileage may vary. Also, for your first time, I recommend baking sheets that have sides – like jelly roll pans or similar. If your filling escapes, and it may, you want that contained.
- Preheat the oven to 425°F.
- Once the filling is cool enough to handle, take the dough out of the refrigerator and cut it into 16 even-ish parts.
- Take one of the 16 even-ish parts of dough and gently mold it into a ball in your hands. Then place it on a floured or otherwise covered countertop (sometimes I flour my countertop but to be honest, this time I used parchment paper because I had literally just cleaned the whole kitchen and I was not doing that again) and roll it out to about a 6″-7″ long rough oblong shape. You’re going to have to figure out for yourself how big you can roll it out without making it too thin to use – I wanted the crusts as thin as I could get them, but you may prefer thicker crust, and that is fine too. If you prefer thicker crust or just want more dough to work with in each pasty, just cut the dough into fewer parts. This is your dinner, do your thing.
- Place a dollop (I used about 1/4-1/3 cup) of filling on one side of the crust, leaving at least 1/2″ space on all edges. Top it with a Tbsp or two of cheese if you’re using cheese. Then fold the crust over, sealing the edges. If you floured your worktop, you may want to add a little bit of water along the edges to ensure that they seal. Since I didn’t flour my worktop, I just kind of mushed the edges together and rolled them up a little.
Place the pasty on one of the baking sheets and seal the edges with the fork by pressing down gently on the seam with the flat of the tines. Brush the pasty with the scrambled egg and then use the fork to pierce the top once or twice for ventilation. - Repeat this process for the rest of the little dough chunks.
Baking
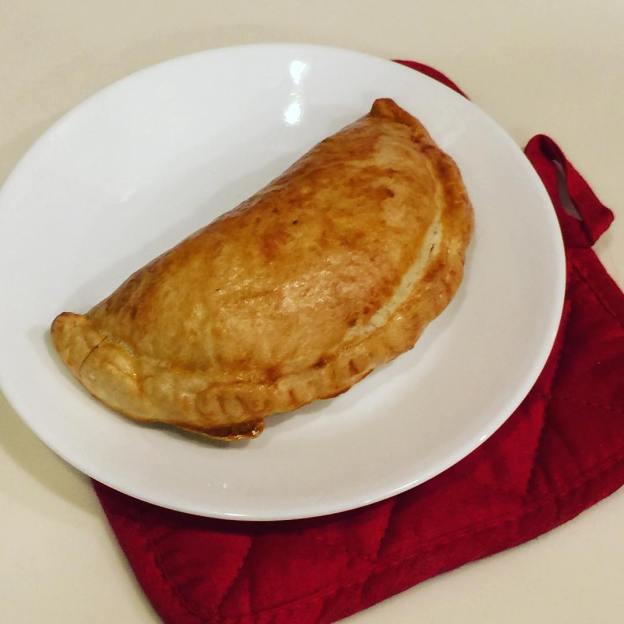
Once you have your baking sheets filled with pasties ready to be cooked, place the sheets into the 425°F oven for 30 minutes. After 30 minutes, take them out, move them to cooling racks if desired (by this point, my kids were in full-out revolt so I had to do anything I could to make them cool more quickly), and serve. Enjoy!

Love pasties. Don’t have any problems using commercial pastry and no shame. I’d rather be eating than kneading. 🙂 Nice recipe, Marie.
LikeLike